Next Steps
- None!
Completed Steps
- buy materials (only $30 roughly!)
- buy tools (lots more lol)
- cut to size (thanks, cuñado)
- plane and sand
- Apply more coats of verathane
- Assemble- predrill and screw
- Affix placard
- Fill with toys
- Place at destination (might require shovel work)
Backstory:
So, the plan with this one is to create a “take a penny, leave a penny” type bin for toys at the beach near me. It’s been a great learning experience in woodworking and I even got to justify the purchase of more power tools!
The idea came to me on the near-daily walks with Zoey on the beach. There are so many plastic toys getting left on the beach, and I felt they could be reused. Since the City of San Diego is too gigantic to deal with such an issue, I reached out to the Pacific Beach Town Council, but heard nothing back. I plan to plop it down anyway, and see what happens.
My wife and I have been gathering abandoned toys on our morning walks for awhile now, so it should have a pretty good start.
Finished!
The box came out more lopsided than imagined, but it works great! It’s been about a month and there have been multiple full cycles of toys. I’m thrilled that the community has been accepting of it, and that it hasn’t been removed.
And Death
We ended up moving further away and went to the beach less, and the check-ins got to be more depressing, typically mostly trash and it was used more as a lost and found for kids socks. I kept putting toys in, but they would dissapear too quickly. I noticed there were usually toys I didn’t add, but none would last more than a week.
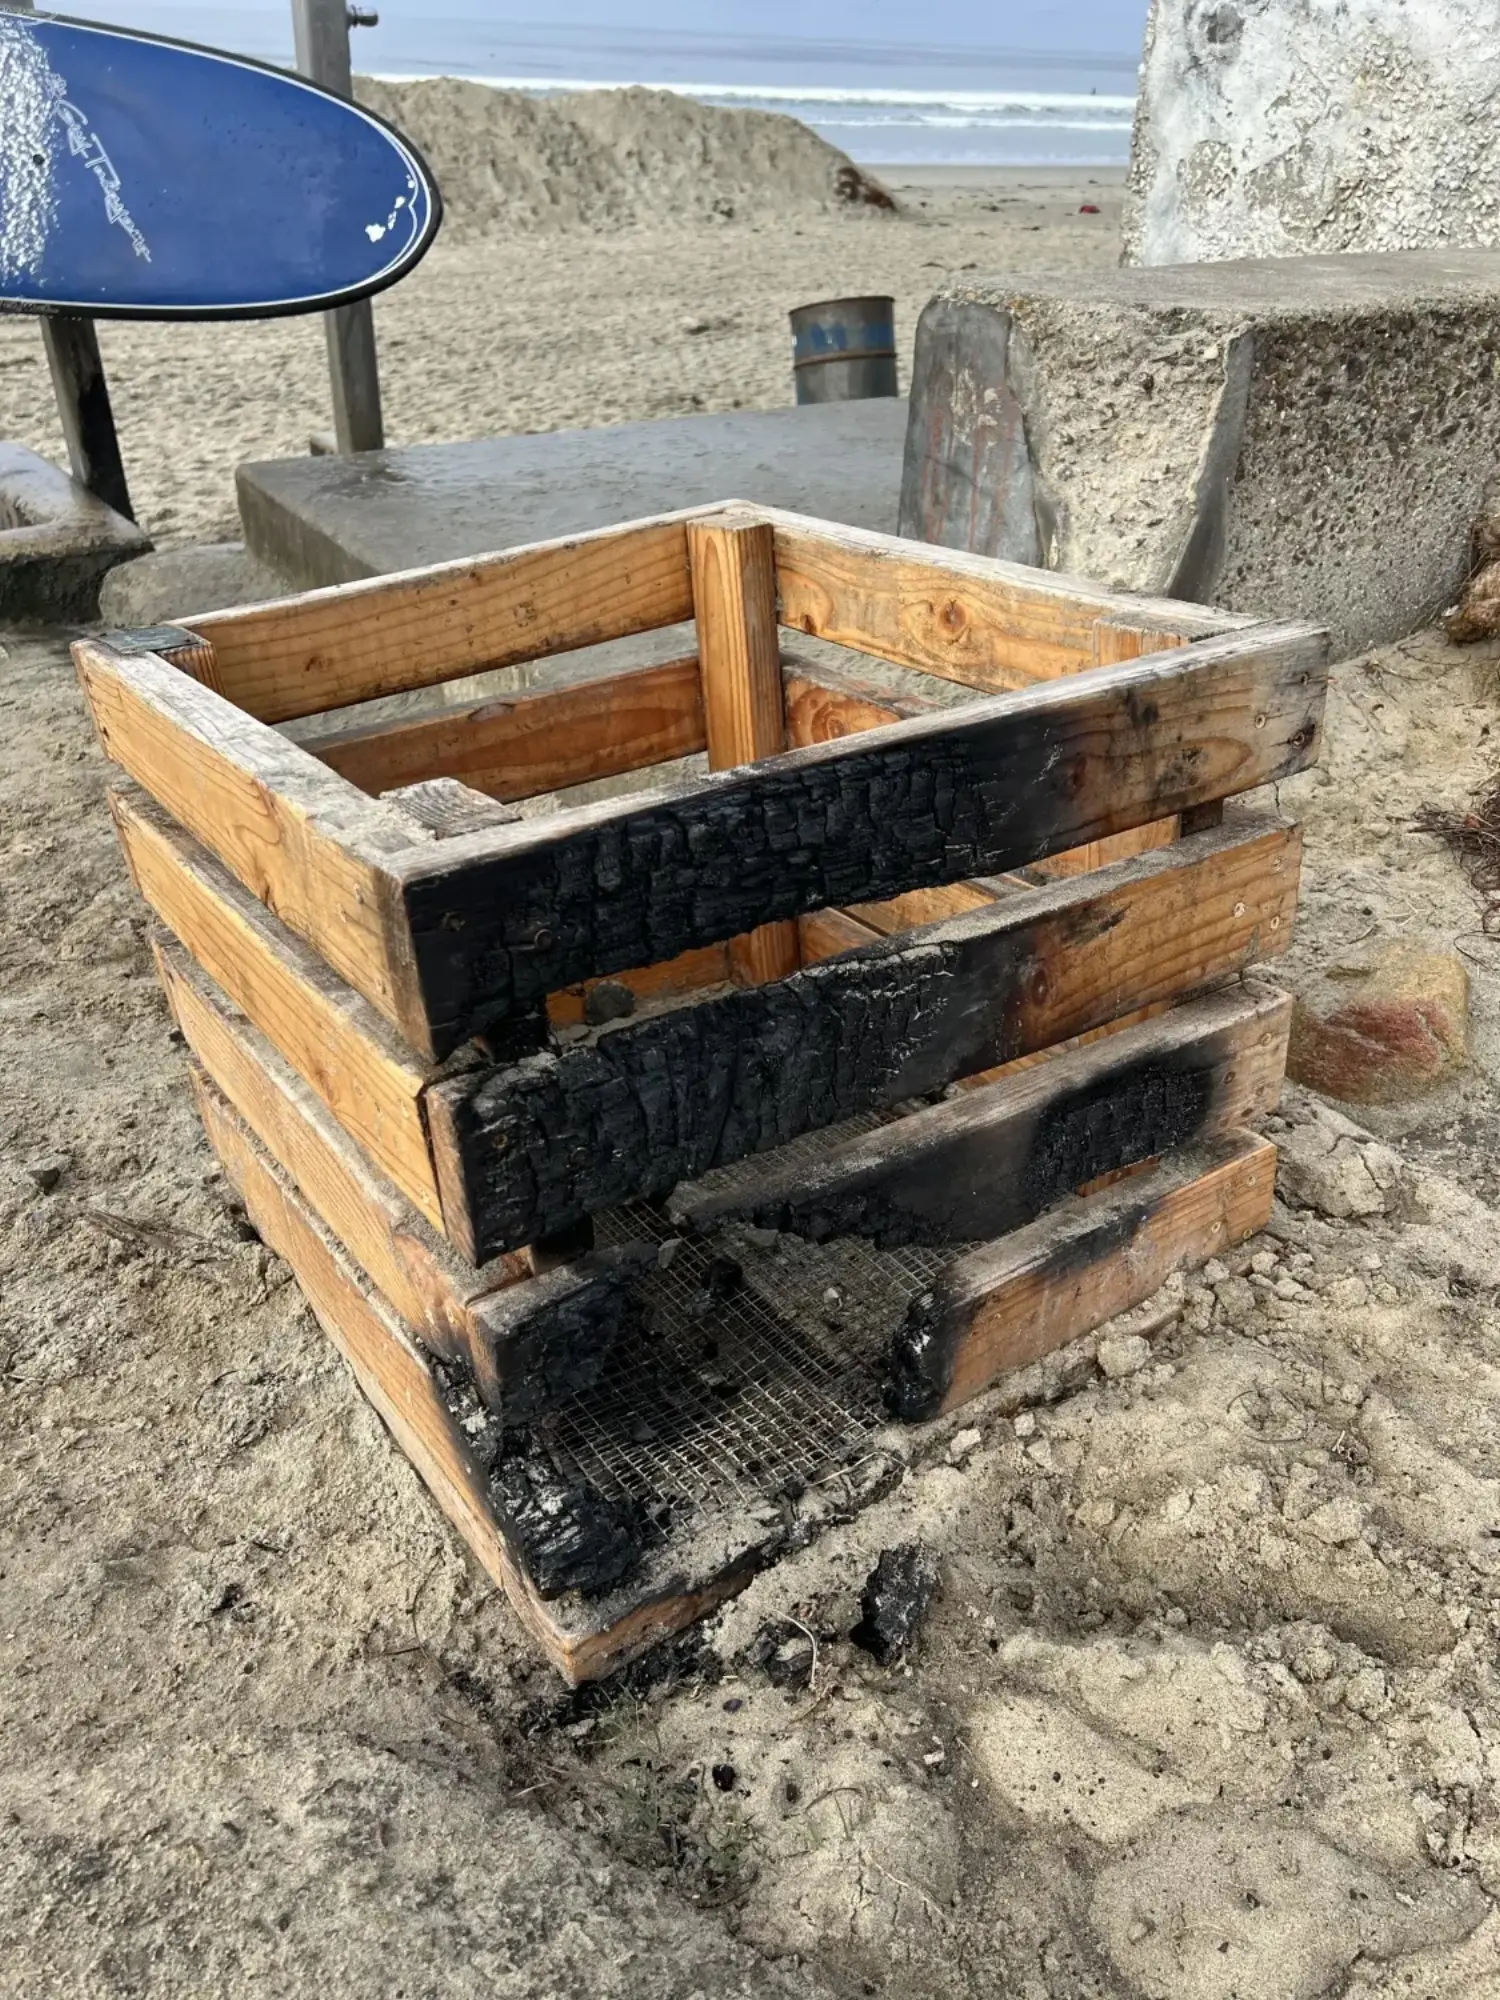
One day I cam back, it was in its place but it looks like people tried to use it for their fire, but it must have burnt abysmally with all the waterproofing I did.
It was in an unsafe state, so I came by later and took it away. It was a fun experiment, but ultimately the sucky people beat out the good ones. I have no plans to make a new one here.